
Netlify is an incredible platform for deploying modern web applications continuously. However, keeping track of failed builds or successful deployments is crucial for any development team.
In this guide, we’ll show you how to connect Netlify to AlertHub to receive instant notifications on your favorite channels (Slack, Telegram, Email, etc.) whenever a deployment happens.
Step 1: Create an AlertHub Project
If you haven’t already, the first step is to set up your project in AlertHub.
- Log in to AlertHub.
- Click on New Project.
- Give it a recognizable name, like “My Netlify App”.
- Once created, you’ll land on the project dashboard.
Step 2: Configure Your Notification Channels (Optional)
Before we start sending alerts, decide where you want to receive them. Go to the Connections tab in your project:
- Telegram: Connect the bot to receive alerts on your phone.
- Slack: Link a channel for your team.
- Email: Add your email address for important digests.
You can skip this for now and just check the dashboard, but we highly recommend setting up at least one channel.
Step 3: Configure Netlify Webhook
Now, let’s tell Netlify to send an event to AlertHub whenever something happens.
- Log in to your Netlify account and select your site.
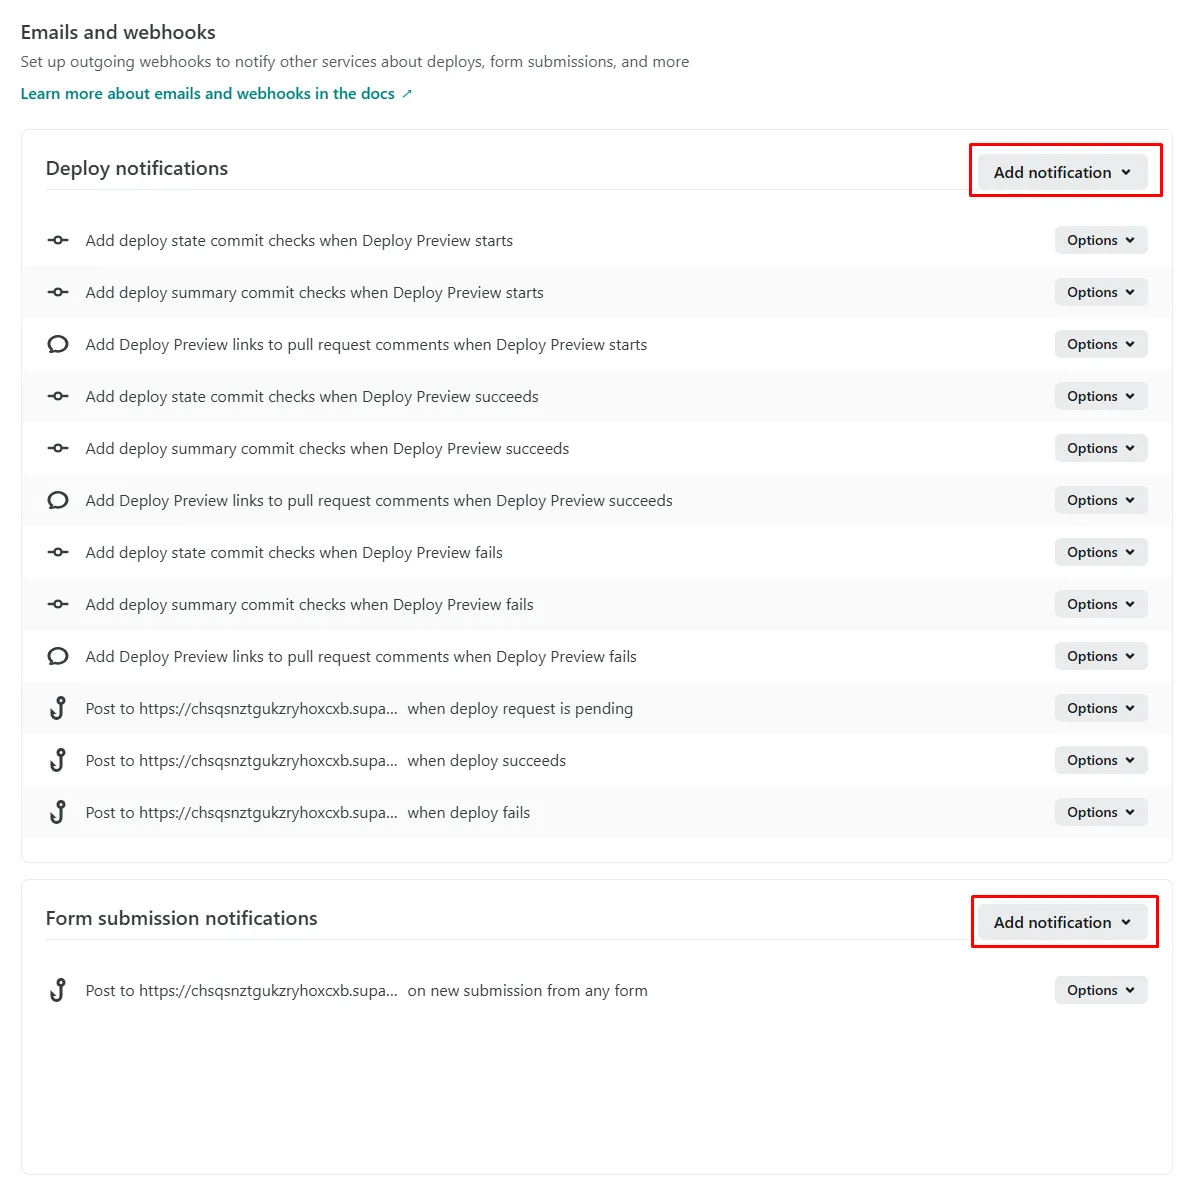
- Go to Project configuration > Notifications > Emails and webhooks.
- Click on Add notification and select HTTP POST request.
- Choose the Event to listen for.
- Copy the Webhook URL.
Step 4: Setup the Webhook URL using AlertHub’s Generator
This is where the magic happens. We need a URL that tells Netlify where to send the data. Netlify sends a payload with details about the build (commit message, status, branch, etc.).
We can use AlertHub’s Custom Webhook Generator to create a URL that automatically formats these details into a readable message using Dynamic Placeholders.
- Go back to your AlertHub Project details page.
- Find the Access Credentials section.
- In the Custom Webhook card, fill in the following:
- Title:
Netlify Notification - Description:
Deployment status: {{state}} for branch {{branch}}.\nMessage: {{title}} - Level:
info - Source:
Netlify
- Title:
- Copy the generated URL at the bottom of the card.
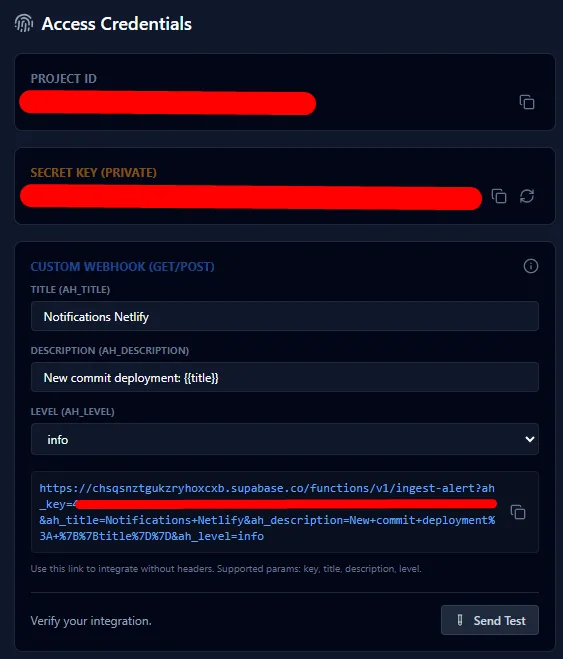
The URL will look something like this:
https://api.thealerthub.com/sendAlert?ah_key=YOUR_KEY&ah_title=Netlify...
Paste this URL into the Netlify Webhook configuration form you opened in Step 3. You can choose to trigger this on “Deploy started”, “Deploy succeeded”, or “Deploy failed”. We recommend creating separate webhooks for “success” and “failed” if you want different alert levels (e.g., using critical level for failures).
Step 5: Receive your Alerts!
Trigger a new deployment in Netlify (e.g., push a commit).
AlertHub will receive the webhook, replace the {{title}}, {{state}}, etc. with the actual data from Netlify, and forward the notification to your connected channels immediately.
Stay on top of your CI/CD pipeline without constantly checking the dashboard!
Runtime crashes inside a Function are a different event — catch them in code: Netlify Function failure alerts.